Friday, 7 September 2012

Another African sunset - pastel painting


If you have been following this blog, you will know that I love sunsets. I find the ideal medium is pastel. I have previously painted a series of african sunsets in watercolour, these were actually artists trading cards. For this attempt, I decided to use a little larger format - an A4 sized paper, actually an orange coloured paper. For our American cousins, this size is approximately 8.5 X 11.5 inches or a little less tall than foolscap.

Although there is lots of orange in the painting, I don't think that any of the original surface is left showing through the finished work.
Here is a view of the painting:-


A much larger version of the image can be seen on my Flickr photostream.


As with previous posts, I have included here details of the painting, so that you can see how I use the pastel to achieve the textures. I covered the upper part of the painting with an orangey-brown ( don't know the exact colour as the labels are missing - a good reason for leaving the labels on. However, I tend to use the sides of the broken up sticks so no chance of that. the lower part was covere initially in black. Both areas were blended with finger tips and fixed between coats to cover the paper absolutely. The pastel was again fixed. I find that this provides a fabulous tooth for the the later pastel colours, which I can build up to a significant thickness.

Here is a detail of the left-hand tree foliage:-


You can see here the sweep of the pastel, using the side and skipping across the surface of the sky. the sky had been completed by blending in a darker brown into the corners; two shades of yellow provided the lighter area, and white for the sun. The blending action may have affected the colouring of the various areas. These lighter colours were not fixed prior to the trees being painted on.

The tree branch crossing the sun:-


The actual branch is drawn much lighter than where it crosses a source of light, the sun. And the LH tree near the horizon:-


Here you can see the effect of blending-in various dark greys to produce the ground contours. the vegetation on the horizon itself was painted in with the edges of the sticks and pulled into the ground by rubbing with a fingertip.

The image may be seen on a wrapped canvas or on a number of smaller gifts in one of my Zazzle stores.
For UK based readers, see my UK Zazzle store, Artyfax

Wednesday, 22 August 2012

Snowdrops at Painswick in artists pastel

Another tree painting!

Well, I can't resist. We visited Painswick Roccoco Gardens (Cotswolds, UK) this week and I was knocked out by an "art in the garden" exhibition. Mostly sculpture and installations as you might expect but adult art classes are also run during the year. On the day of our visit, there was a small group of artists working with pastels on the subject of architectural paintings in a garden/natural setting. Not really my subject but it did inspire a little sketching and photographs in the gift shop gave me a perfect subject. Apparently, the gardens has the largest naturalistic planting of snowdrops in the UK. I was hooked.

This is a direct result as soon as I got home (well, I did help to unpack first):-


I think I quite like this one, of course I am still using the side of the pastel to create texture in the bulk of the painting:-


as you can see in this detail of trees. But I can't help thinking I may try this again and use this approach for the snowdrops (a maass of colour) rather thata trying to paint them individually as I have here.

Watch this space!

Wednesday, 25 July 2012

Across the fields in summer

Another pastel painting ffrom that book, "30 minute Pastels". This time a subject I have historically had problems with. I seem to manage well with aerial perspective - colours are my strongest point but put in any recognisable feature such as the fields here and I never seem to satisfy my own standards. I must admit that I tend to shy away from these sort of subjects and perhaps that is why I am still doing the same things wrong.

The new painting is basically an image of fields, distaant hedges, a track and a few dwellings, the red roofs of the buildings amongst all those yellows and greens is what attracted me to it; this is it:-


As I said this doesn't seem to feel right, I have done this type of scene as in this sketch book page of a view from a hotel we use on Cleeve Hill, in the Cotswolds:-


This at least looks to me as if it is drawn to scale, Maybe I shold persevere and do a lot more distant views. Anyway, here are a couple of details from the painting from the areas of the buildings. Did you notice the tiny red roofs at the top of the far hills - in the center of the horizon?


Youo can see in these details the texture I achieve with the side of the pastel, there are at least two greens in the fields in the lower image, with an added touch of a yellow. One point is that the details may be too detailed for distant objects and do not fit in with the overall effects of less detail with disstance. Again more practice and analysis.

Thursday, 28 June 2012

Spanish Sunset - Pastel Painting

OK, I have painted another pastel, this time not a tree in sight.

It is taken from a book called 30 minute PASTELS. I love the loose style which the author adopts to complete a painting in this short time. Exactly the way I like to paint. I have actually done this once before but the result was not quite as I wanted it. I was at a loose end this week and flipping through one or two books and magazines and came across this particular image. I knew straight away that i had to have another shot at it.

The beauty of this one is the use of the side of the pastel stick to create incredible textures. And of course the redness of it! Makes a fantastically emotive landscape, I feel. The drawing is not as good as it should be but using thick pastel sticks it is difficult to work with any detail.

Anyway here it is for your perusal, I would love to know what you think about it.


The way I approach this sort of painting is to first of all create a background in a suitable colour using the sides of the pastel sticks. I would normally use more than one colour, creating a complementary under-painting which I fix with (shock horror) cheap hair spray. This has two functions:-

  • It prevents the "empty canvas" syndrome and subsequent procrastination.
  • It provides a marvellous tooth for subsequent layers of pastel.
In this case I had already got a background in my satchel, I had prepared a few earlier without any consideration of what the final paintings may look like. The background in question was simply the perfect colour for this piece.


You will notice that it is not made to be uniform, it could have been far more varied but for this subject as I said it seemed perfect.

I then carefully selected a few pastels; yellows, reds and oranges and stroked the paper with the side of the sticks to create the variation of colour in the sky and the water. Light and loose strokes provide the required texture, which can be seen in the following details.


It is important to use a light touch and to skim the surface. This leaves the background showing through, so it is important to use a background with the right colours. I did say above that I often use a complementary colour (to the top layer) which gives a really sparkling effect. Here though, The colours are from an analogous (hot) colour scheme.


To complete the painting, one or two details; the sun and its reflections are included with a subtle approach - not too much to stand out uneccesarily. The far shore / mountains are created in a very similar way using a dark brown and a soft black.

Finally the two boats are then drawn in a soft black pastel. As I said, the drawing could have been better and if I do it again (as if I would!) I will use a thin stick of soft charcoal so that I can put a little more detail in here. Not too much just a little more detail.


It always feels good to get out of a rut and this painting has certainly pleased me both in its creation and its final appearance. (offers accepted. LOL)


Saturday, 23 June 2012

My latest pastel painting - more trees

Yep, I am afraid that I am still painting trees,. Although this time I have included a river and colourful vegetation.

I came across a photograph on Redgage, a site I am becoming fond of as I can post articles and pictures and even links to posts elsewhere and earn a little of the hard stuff for each viewing.
The photo was of a winter scene in the Allegheny Mountains by an artist and photographer who goes by the name of paintsonslate.

Again I worked in pastel a medium I am becoming increasingly fond of, I am doing very little in watercolour and acrylic and almost no oils. It was on a card base which was quickly covered in light blue as the sky and water covered a large part of the painting. After this first stage painting was worked around the card with fingers, I fixed it using an inexpensive hair spray. I worked different blues, greys and white into the sky and the area of the water an again fixed. Because the light colours lose their effecct with the fixing, I knew I would have to touch up parts after the trees were painted in.

I worked with several greens and earth colours to model the thicker limbs of the trees, and then outlined some of these areas with much lighter colours to contrast against the background where it was darker.


The reddish reeds/vegetation was put in and then detail added with a brighter red and yellow.


Once I had completed the trees to my satisfaction, I touched up white parts of the sky and painted over the water of the river because the waves and shadows were far too marked.


I mostly finished the painting in one evening at my art group but left it for a week and then looked at it again. It was this second time around that I decided to darken the trees, and the mountains (which were mostly painted before the trees) and to add more white into the sky. I also painted over the river to calm the colour contrasts. This sort of thing is of course quite common. Leave a work for a few days when nearly finished and with a fresh eye you can nearly always see how to improve it.

The completed work:

As usual, a larger version has been posted onto my flickr photostream.

Wednesday, 6 June 2012

Painting To Find My Feet Again

Having suffered a bereavement in the family, it has been difficult to maintain interest in art, but going to a weekly art group has been a great help. I have been toying with pastel paintings ( they don't need much setting up - just paper and a few chalks) and although nothing very exciting had been forthcoming from my efforts, the past couple of weeks, I seem to have produced a couple of half decent painting. I thought that they would be worth posting here.
The first was something I dredged up from my own mind, I had started a background to try out some black sketching paper which I had been bought for christmas. Various family illnesses had stopeed me experimenting before then and I found it was not really suited to pastel, at least not for my style - I thought. However, I did not throw the background away, and looking for something to do last week I decided to carry on with it.

Now my approach with pastels is to cover the ground (paper in this case) with one, two or even three colours so as to provide an interesting base to paint on. This is an example:-


I then use an inexpensive hairspray (I am incorrigible!) to fix this layer for two reasons
  1. I can overpaint without colours mixing or smudging
  2. The grittyness of the fixed pastel layer provides a great "tooth" for subsequent painting
Although the black paper did not appear to work well at first, with the added (fixed) layer it became quite amenable to being used by overpainting. I stayed hard at work for about two hours with a short break for coffee and this was the final result.


Now I was very happy with this, and have received some very good feedback. I had at last done something I could feel proud of which wasn't totally abstract. Not that I have anything against abstract art of course, but I felt much better at this. Very atmospheric, I was told by one of my crritics.

Last night, with this in mind, I decided to try and finish a painting with a similar theme which I had started some time ago. Again, I felt pleased with the final result, although not quite so pleased as with the one shown above.


I hope that I have come through what has been a very difficult time, and will be back to enjoying my painting and other artistic endeavours. They say time heals, well time and art may well be helping to do just that. Coming back from a very low point, I am beginning to feel quite positive and optimistic.


Monday, 4 June 2012

Painting Abstracts - how to learn by doing

I have always been interested in abstracts, weel since I sold my first abstract painting. What is it about an abstract which interests people? I do not believe I know but they do sell. Have you considered this genre, many realistic painters find it difficult to create abstracts because they cannot let themselves go. Creating a painting based on composition rather than on a subject is difficult for many people, I had to lead a workshop on painting an abstract at my art group and came up with this methodology to allow and enable such a person ( a realistic painter) to start and complete a painting in an evening.


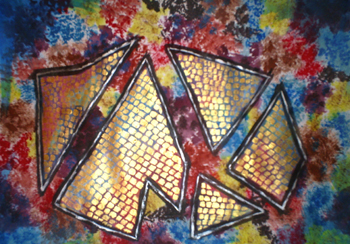
An example created by this method
acrylic on paper, approximate size A4 (11x8.5 inches)
  1. Get the surface covered. A background is easier said than done for some, but simply dont think about it. Just pick a colour! Put down a wash, add texture or patterns. Or draw and paint a grid. It doesn't have to be rectangular or even geometric. Think circles, distortion. But don't think too hard, just cover that surface covered. This is PRACTICE not a masterpiece.
  2. Now, throw in some shapes, lines, colours; just add a little interest. Think in compositional terms. Contrast / Unity / Size / direction / texture / etc. Again this is to allow you to paint an abstract no need to think about what it means or represents. Throw or drip, use a stick or your hand, but do something.
  3. Lastly look carefully and see what is needed to add a little pizazz. I know its not a masterpiece but not all paintings are! Just have fun, fun and more fun. You know about composition, the elements and the principles. If not now is the time to learn. Use this knowledge to make your painting interesting, and don't forget, it does not have to mean anything.
  4. You are finished! stand back and take a bow
  5. Now do another
  6. Using this method you can paint several at once, one of them will probably be good enough to frame.
OK, so you don't believe me and want more information. I have started to write a series of Squidoo lenses (= webpages) on this methodology. Try these for examples and more information.

More will be added in the near future. Just remember, this is not a recipe for a masterpiece but will give you permission to do something which is different and which will ultimately help to loosen your artwork in all genres.


A recent sale at my art groups March exhibition, Title: Yellow Landscape
A pastel painting, approximate size A4 (11x8.8 inches)